24 Brightspace tips (Gradebook)
In designing the template for LEH 250 we used a number of Brightspace features. Since many faculty just learn those aspects of Brightspace that they need at a given time, we thought it would make sense to tell you how to use some of those features.
Gradebook Customization
Based on Bridget’s grading system and the embedded assignments we created the Gradebook. Of course, you will probably want to add your own activity. This is her structure:
- Participation 10% entered directly by her.
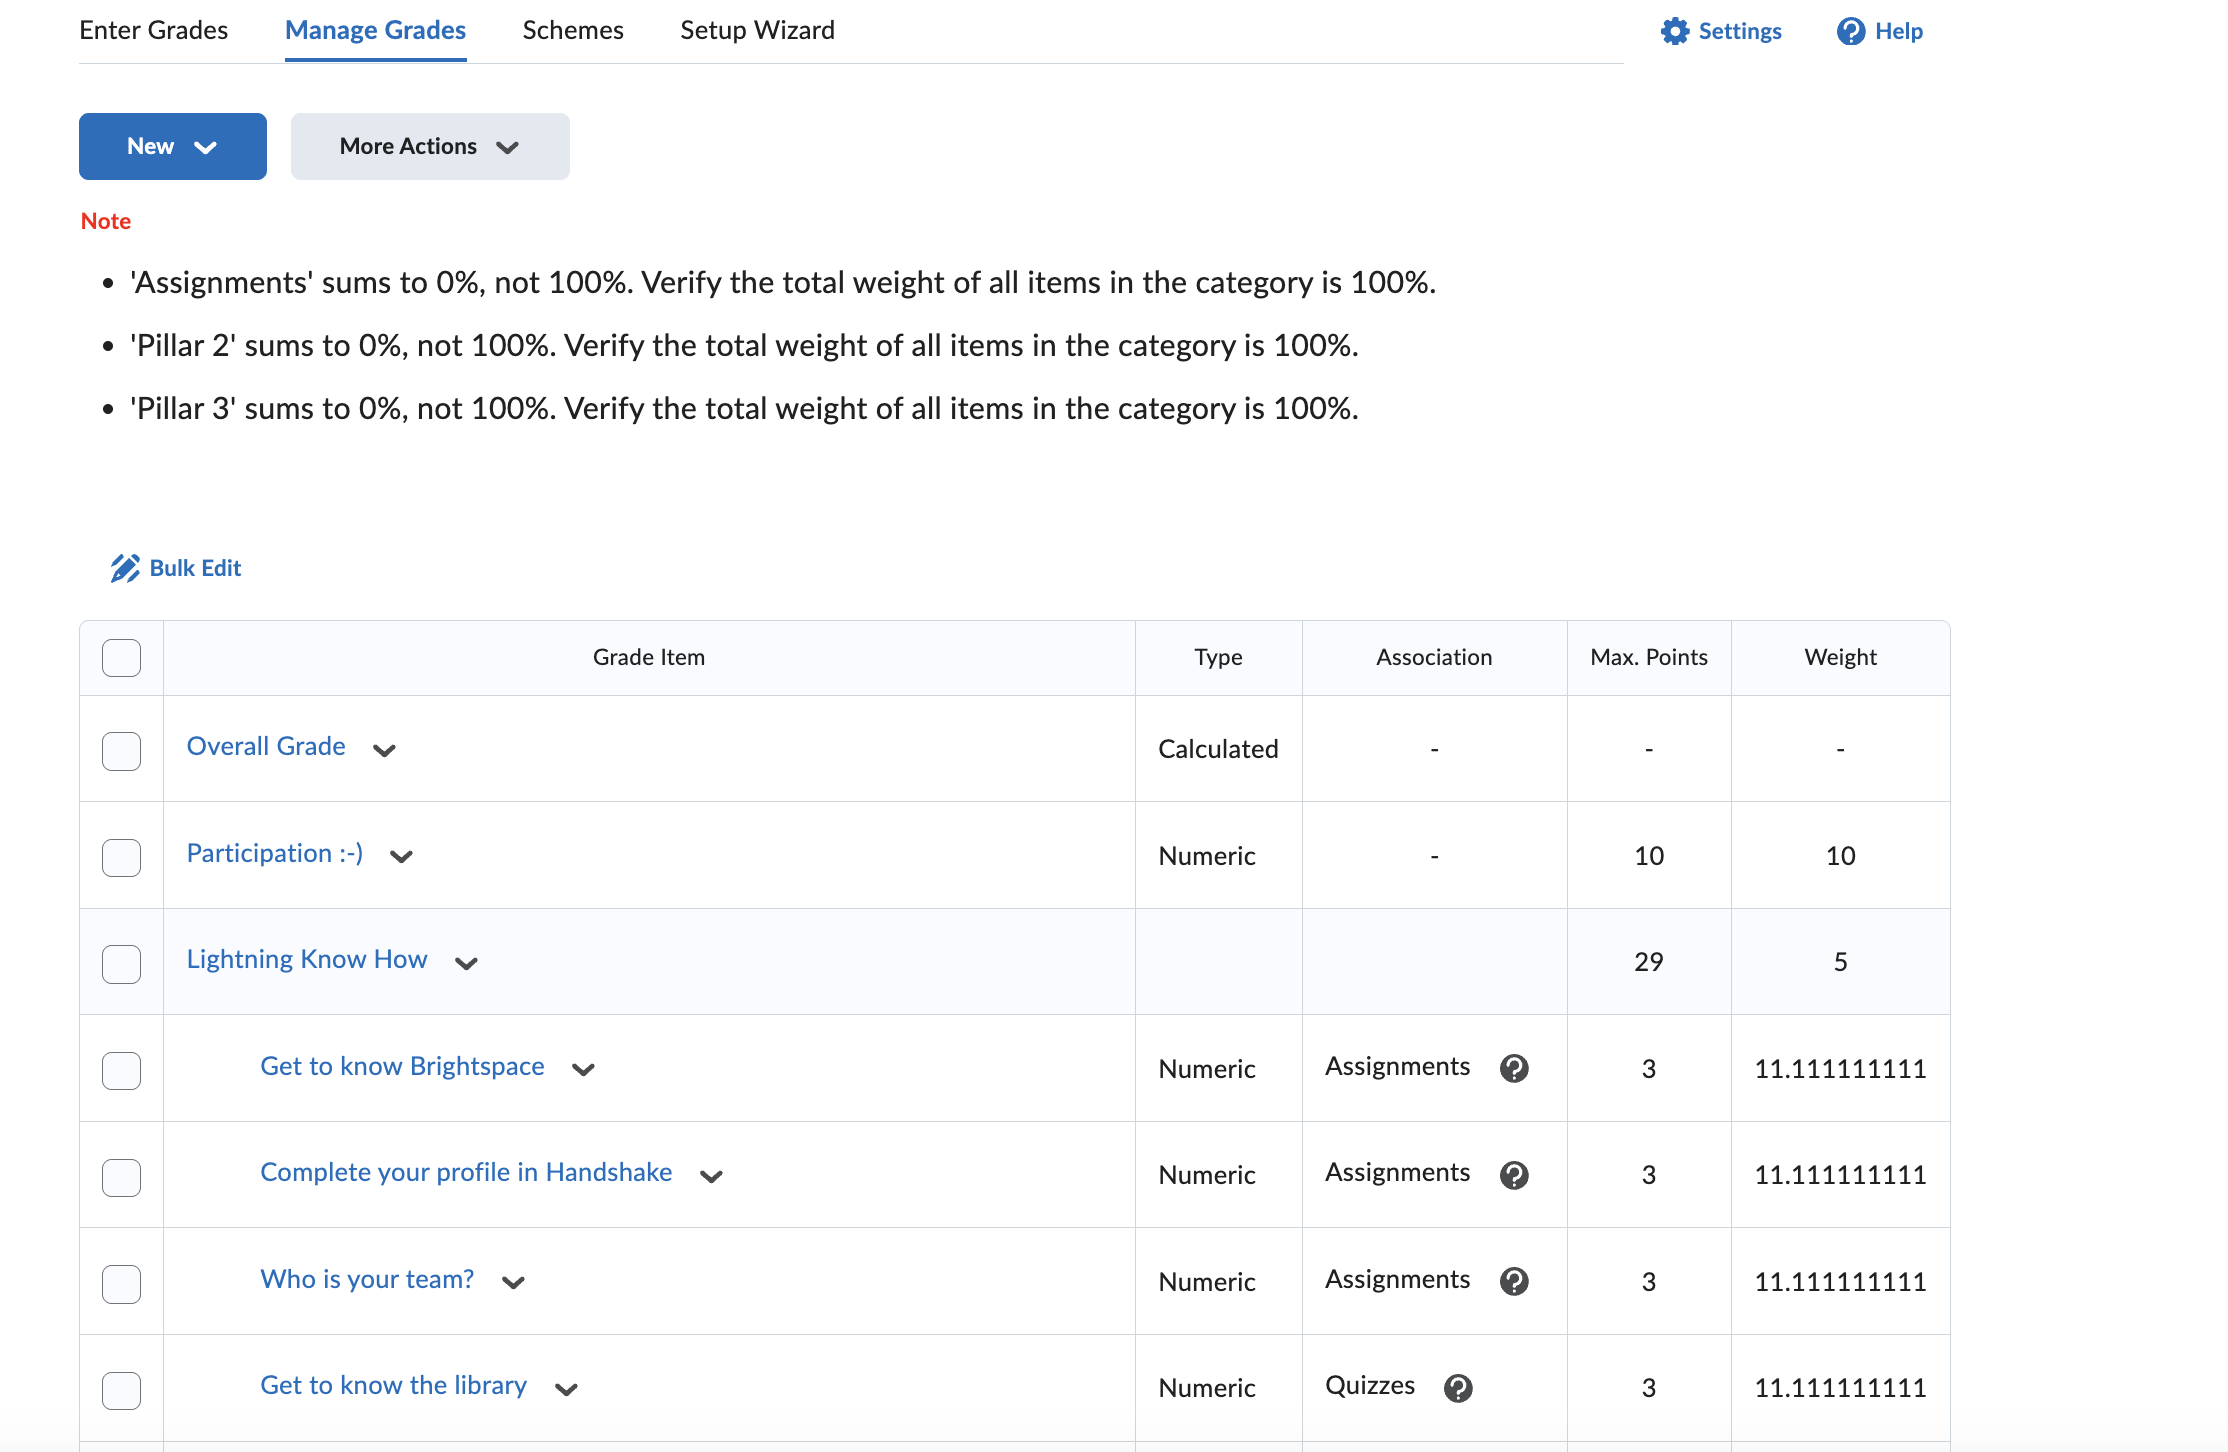
- Lightning Know How 5%
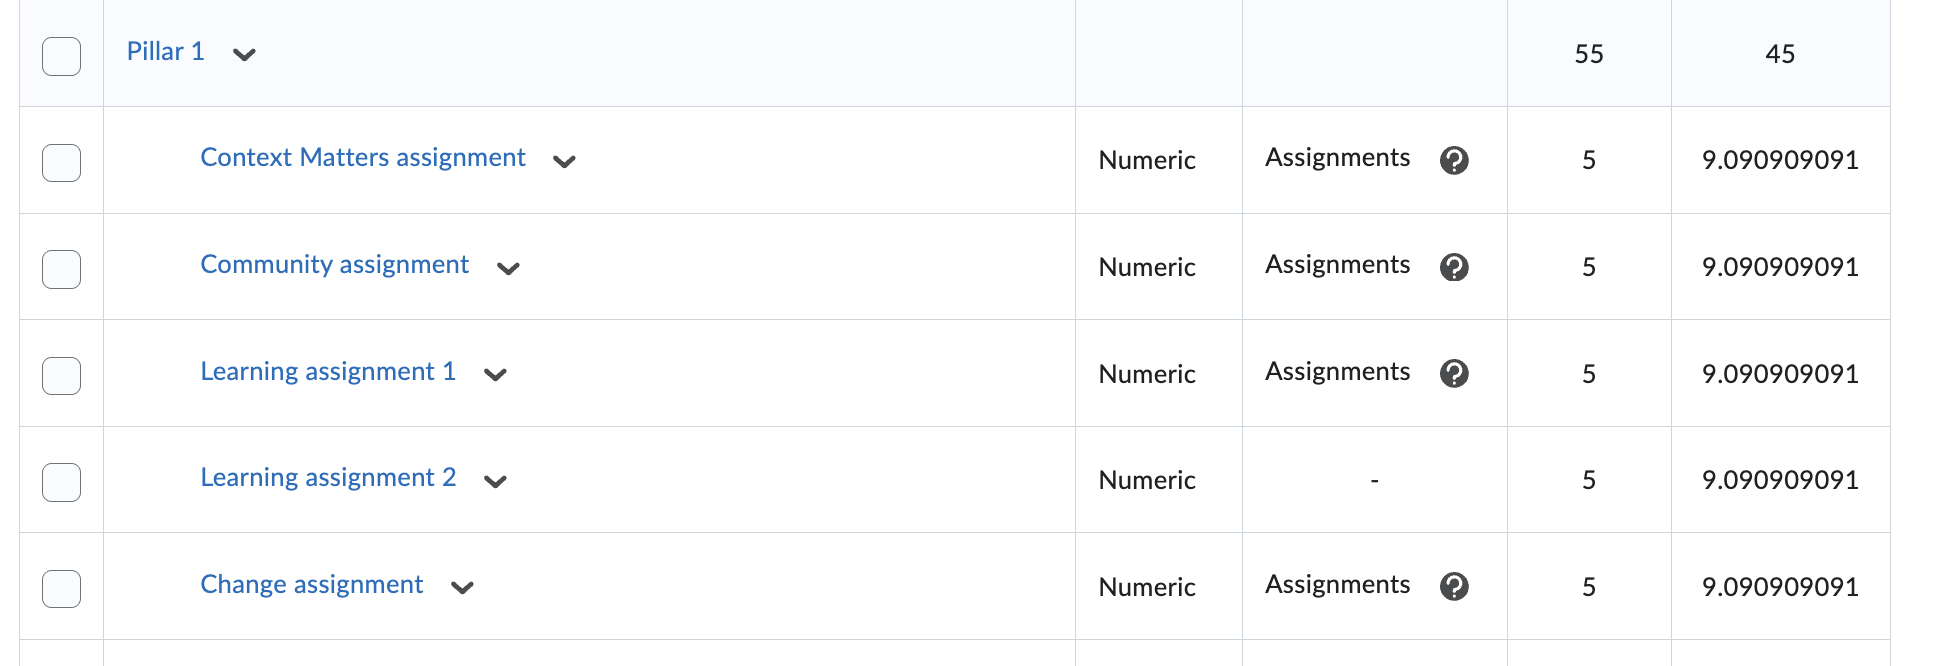
- Pillar 1 assignments 45%
- Mid Term project 15%
- Final Project (Deep Dive) total 25%


Within each of those groupings the weights are evenly divided. You can see this by clicking on Grades on the top menu and then going to the Manage grades tab.
You will see that each of the items above is a main heading and that underneath it are the various activities and assignments. You will also see that we created headings for Pillar 2 and Pillar 3 in case you want to use them.
We used the Categories feature of Brightspace.to set this up. If you edit any of the items on the Manage tab you will see the option to put it into a category.
In this case the item is in the Lightning Know How category.
When you create any new items you can put them in the categories we defined or in new categories you create. Just make sure that the total weight of the categories adds up to 100%. Brightspace will put a message if your percentages do not add up to 100%.
In Brightspace, when you add new graded activities you must explicitly set them to show up in the gradebook.
You can delete categories you are not using.
In creating the template we decided to use a simple system for grading. This is because we assume that many faculty will probably want to modify the grading and will be adding their own readings, activities and assignments. You may also want to weight items differently.
Grading Schemes
Brightspace allows the creation of custom grading schemes. These can make grading easier. We created two custom schemes.
 “Leh 250 3 check” and “Leh 250 credit/no credit.”

The first provides grades of check, check minus, and check plus. We suggest these for the Pillar 1 work.
The second is all or nothing completion. We suggest this scheme for lightning know how.
None:
When your shell is first set up you will see a note at the top that says
These are categories that you can put you own assignments, quizzes etc in. Use the naming that makes sense to you. You can delete the categories you are not using to get rid of the note.
