The Ultimate Guide to Growing Runner Beans in Pots
Introduction
In the world of compact cultivation, growing runner beans in pots is a high-note strategy for flavor and productivity. With this guide, you will have the knowledge of how to grow runner beans in containers.
Choosing the Right Pot
Pot Size
Unlike dwarf or bush beans, the runner bean aspires to great heights, easily surpassing six feet. You should choose a pot at least 12 inches deep and 12 inches wide. The more spacious the pot, the better the plant’s stability and nutrient uptake.
Pot Materials
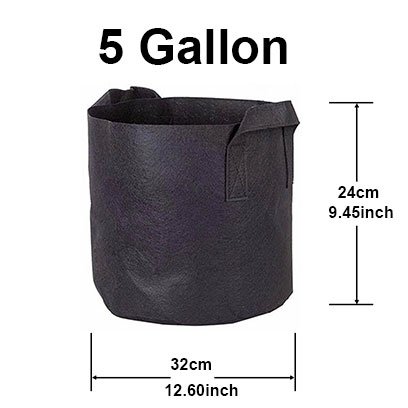
Terra cotta offers natural breathability to the plant’s roots. But they can dry out quickly, necessitating more frequent watering. Plastic plant pots retain moisture for longer. But they require a more careful approach to avoid root rot. Fabric grow bags for runner beans are an innovative and breathable option. They prevent roots from spiraling and encourage air pruning.
Ensuring Proper Drainage
Good drainage is non-negotiable, especially for beans. Ensure your pots for runner beans has several drainage holes at the bottom. Cover them with a layer of stones or a coffee filter. This prevents soil from clogging the outlet. You might also elevate the pot slightly with pot feet. This allows excess water to escape freely.
Soil Preparation
Selecting and Mixing Potting Soil
You should use rich, well-draining soil for the beans. Mix your potting soil with compost or well-rotted manure before growing runner beans in tubs. This can increase the soil fertility and improve its water-holding capacity. Create a simple mix by combining two parts potting mix with one part organic matter. For example, compost.
pH Requirements
Runner beans prefer slightly acidic soil with a pH between 6.0 and 6.5. Use a pH testing kit to ensure your soil meets this requirement. Make adjustments by adding lime to raise pH or sulfur to lower it. Maintaining the correct pH will aid nutrient uptake and overall plant health.
How to Grow Runner Beans in Pots?
How to Plant Runner Beans in Pots?
Start by planting your runner beans after the last frost has passed. Place one or two seeds about an inch deep in the center of the 4 gallon pot. Growing runner beans in a grow bag is also available.
Add a trellis or support structure for the beans to climb. This can be a bamboo stake, a wire tower, or even a simple lattice placed in the pot. Water the seeds gently as they begin to sprout. Keep them consistently moist, but not waterlogged.
Pre-soaking for Success
You can pre-soak runner bean seeds for 12 hours before planting. This can speed up germination and ensure a more even emergence of your vines.
Seeds vs. Seedlings
Starting with seeds allows for direct sowing. But runner beans do not always respond well to being transplanted. However, planting seedlings can give you a head start. Especially if your growing season is short.
Watering and Care
Proper Watering Techniques
Consistent and appropriate watering is vital. Especially runner beans are high-need water-wise plants. You should water them well when the soil feels dry to the touch but never sodden. A good indicator of when your beans require water is if the leaves start to droop.
If this is the case, give them a good drink. The leaves will likely perk up again within an hour or so. Overwatering can lead to root rot. Always check the soil’s moisture before reaching for the watering can.
Tips for Providing Support
Support your beans from an early stage. Small trellis in your 20 litre plant pots will guide the beans upward properly. This can prevent them from sprawling.
You can push more sturdy support into the soil. For example, cane. Hook the runner bean plants as they mature. Keeping the pods off the ground will prevent rot and aid in the ease of picking.
Sunlight and Temperature Requirements
Selecting the Ideal Location
Runner beans require six to eight hours of sunlight a day. When choosing the spot for your pots, consider the sun’s path and the periods of direct light your beans will receive. South-facing balconies or windows are often the best spots. They usually provide the most consistent and extended sunlight throughout the day.
Protecting Runner Bean Plants from Extreme Temperatures
Runner beans thrive in warm conditions, with optimal growth between 60°F and 80°F. During the hottest parts of the day, shield your plants to prevent stress. Consider using shade cloth or even moving your pots to a cooler, shadier area.
In case of unexpected cold snaps, have a plan to protect your beans. Bringing them indoors is ideal. You can also use frost covers to maintain a warmer temperature around the plants.
Fertilizing Runner Beans
Choosing the Right Fertilizer
You should provide runner beans in pots with balanced fertilizers. Phosphorus can robust root and flower development. Potassium can promote pod growth.
You can use different granular and liquid fertilizers. Follow the package instructions regarding application frequency and dosage to avoid overfeeding. This can lead to excessive foliage at the expense of flowers and pods.
Tips for Using Organic Fertilizers
The organic fertilizers can nourish the beans and the microorganisms in the soil. Vermicompost, compost tea, or fish emulsion are excellent choices for organic fertilization. They also contribute to soil structure, moisture retention, and microbial activity.
Pest and Disease Management
Identifying Common Pests and Diseases
The common pests are aphids, spider mites, and bean fly. Bean rust, bacterial blight, and powdery mildew are common diseases. Early identification can save your plants from debilitating damage.
Prevention Strategies
Prevention is the first line of defense. You should use best runner beans to grow in pots. Make sure they are disease-free seeds. Rotating crops if you’re growing beans in the same area continually. Maintaining good air circulation around plants can prevent many issues from arising.
Natural Pest Control Methods
Adopting a few natural strategies can keep many pests at bay. Planting flowers to attract natural predators. For example, ladybugs, lacewings, and spiders. You can blast afflicted plants with water. You can also use physical barriers to dislodge pests. For example, row covers. For diseases, a milk spray (one part milk to nine parts water) can prevent outbreaks.
Homemade Pest Repellents
Homemade repellents can be effective and toxin-free. Mixing garlic, onion, or hot pepper with water. Spraying the solution on the plants can repel certain insects. A simple solution of water, dish soap, and neem oil can also deter pests without harming the environment.
Harvesting and Storage
How to harvest runner beans in containers?
Once your runner beans start to appear, harvest them often to encourage more to grow. Pick them while they are still young and tender. A good rule of thumb is when they are around six to eight inches long, before the seeds inside start to swell.
Handling and Storing of Harvested Beans
Store harvested runner beans in the refrigerator. Use them within a few days for the best flavor. If you have a surplus, consider freezing or canning the beans. You can enjoy them throughout the year.
To freeze, blanch the beans in boiling water for a couple of minutes. Then, transfer them to an ice bath. Once they’re cooled, pat them dry and pack them in airtight containers or freezer bags.
For canning, you will need a pressure canner and a reliable recipe. Ensure the correct processing time and safety. Canned runner beans can be a convenient addition to your pantry. But you should follow proper canning guidelines to avoid the risk of spoilage.
Conclusion
Growing runner beans in pots may sound like a challenge. But with the right care, you can yield delicious, nutritious rewards. You will enjoy the pure delight of growing food, right where you live.