Creating OER in Pressbooks
7 Using Pressbooks
In this chapter, you will learn the basic steps for using Pressbooks.[1] This material is based on and includes links to the Pressbooks User Guide by Pressbooks, which includes more detailed information about how to use the platform to create your own books.
Creating Your Account
CUNY students, faculty, and staff can use their email to create an account with the CUNY Pressbooks Network. The following are the steps to take:
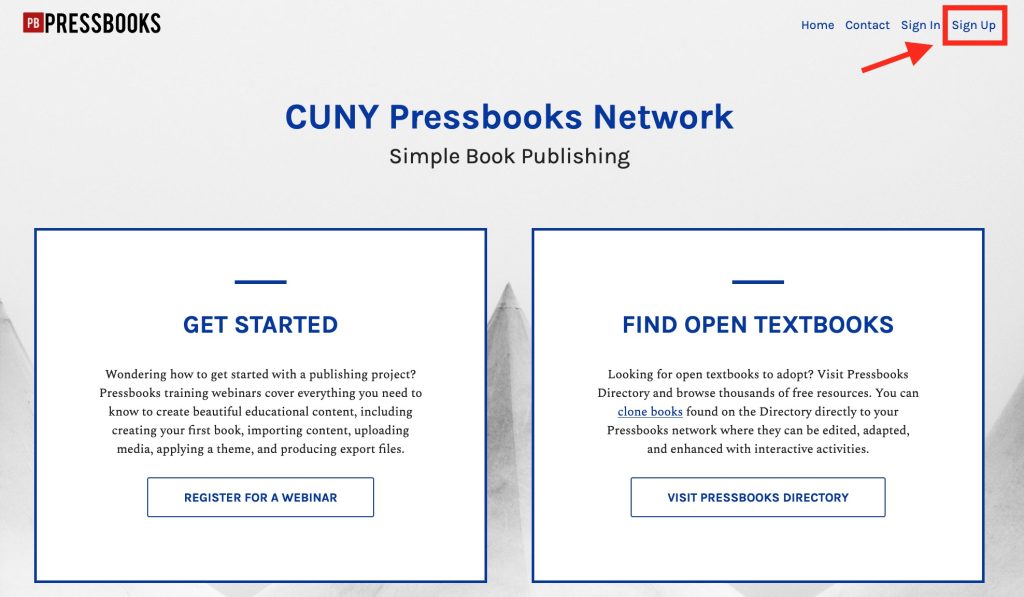
- At the home page of the CUNY Pressbooks Network, click Sign Up in the upper right corner.
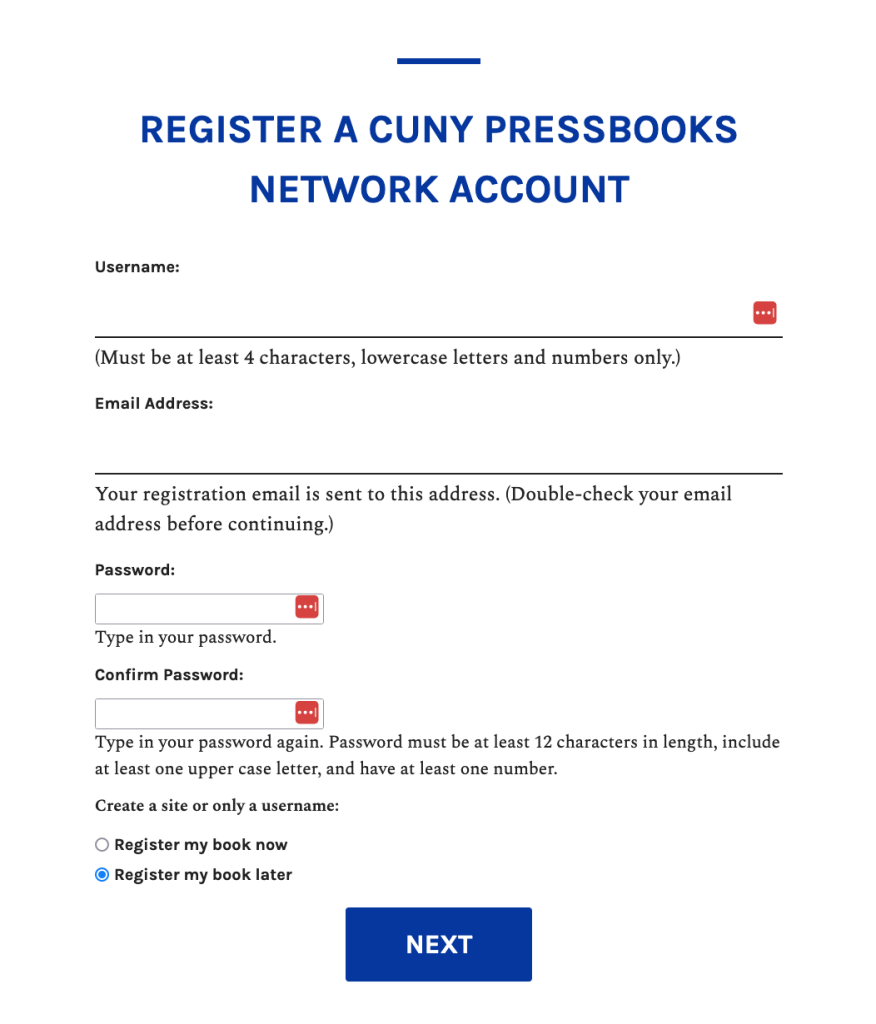
- Create a user name and password. In the field requesting an email address, use your CUNY email address. You can choose to register a new book now or later; the steps for creating a book are outlined below.
- Check the email you provided for a link to activate your account. Follow the instructions to complete your registration, and then you will be able to log in to your new Pressbooks account.
Quick-Step Guide to Making a Book
The Pressbooks User Guide begins with a five-step guide to making a book with Pressbooks. The following are the five steps:
- Create the book.
- Add book information (metadata).
- Add and organize the text and other content.
- Choose the book theme.
- Export the book.
![]() For more information on these five steps, see the chapter The Simple 5 Step Guide to Making a Book with Pressbooks in the Pressbooks User Guide.
For more information on these five steps, see the chapter The Simple 5 Step Guide to Making a Book with Pressbooks in the Pressbooks User Guide.
1. Creating Your Book
The five-step process begins with creating the book, which requires only that you choose a book title (which can easily be changed later) and corresponding webbook address (which cannot be changed later). If you have a CUNY Pressbooks account, log in to your admin dashboard, click the Create a Book button (or, if you’ve already created a book and are making a new one, choose Create a New Book in the My Books drop-down menu), fill in the form, and click the Create Book button.
 The URL address of your book will begin pressbooks.cuny.edu, and you will write the subdirectory—the section of the address after the slash. The subdirectory for this book, for example, is cunypressbooksguide. It’s best to select an address for your book that is clearly based on the title of your book, as in this example. Consider your audience, especially if you plan to reach an audience beyond your classroom, and avoid selecting an address that may seem obscure to others or disconnected from your book. Note that the subdirectory cannot include any spaces or special characters, including hyphens.
2. Adding Book Information
The second step of the five-step process outlined above is adding book information, or metadata, about your book. This information enables others to find and use it. As Pressbooks explains:
The ‘book info’ page is where you put information about your book. In the book publishing industry, this is called ‘metadata,’ or, data about the data. Metadata allows bookstores and libraries categorize a book and make it easier for readers to find. It answers questions such as: What is the title? Who is the author? When was it published? And what is the book about?
The “book info” section is also where you add a copyright and licensing statement for display. Near the bottom of the section, you can find a “copyright” area that allows you to choose the appropriate Creative Commons license from a drop-down menu. There is also a textbox that you can use to include attributions for your source material. This can also be included at the chapter level, too.
![]() For more information on entering metadata for your book, see the chapter Book Info in the Pressbooks User Guide.
For more information on entering metadata for your book, see the chapter Book Info in the Pressbooks User Guide.
3. Adding and Organizing Content
The third step of the five-step process outlined above is adding and organizing the text and any other content to your book: the core of your OER project.
Parts of a Pressbook
As you are preparing to write and compile the content of your book, it is important to give some thought to how it will be organized. By default, Pressbooks organizes each book into three sections—front matter, main body, and back matter. The dashboard allows you to add, delete, or edit content in each of these three sections. The chapters and most of the substantial content of the book is usually structured into chapters and sub-chapters in the main body.
![]() For more information on the parts of a Pressbook, see the chapter Create and Edit Parts in the Pressbooks User Guide.
For more information on the parts of a Pressbook, see the chapter Create and Edit Parts in the Pressbooks User Guide.
Adding Content
To add text and media content to your Pressbook, you’ll need to use the built-in editor. This allows you to add content in two modes, visual or text.
The visual editor is the default tool. It is a WYSIWYG (What You See Is What You Get) interface that allows you to see styling and formatting as they are applied. You can also work in a text editor, or switch to it as necessary for specific needs. Here, you can view and edit the HTML version of any text written and formatted in the visual editor, and you can also write directly in HTML, using the toolbar as necessary.
![]() For more information on using the visual and text editors, see the chapter Edit Content with the Visual and Text Editors in the Pressbooks User Guide.
For more information on using the visual and text editors, see the chapter Edit Content with the Visual and Text Editors in the Pressbooks User Guide.
Embedded Media and Interactive Content
As Pressbooks explains:
Embedded media is media that is hosted outside of Pressbooks and linked to through your webbook. You will have encountered this kind of content all over the web—YouTube videos in blog posts, for example, or social media posts in news articles. This same kind of media can be dropped into the editor of your webbook on Pressbooks. Your readers can watch videos, take quizzes, view interactive maps, and more without ever leaving the book.
There are a few different methods to embed media in Pressbooks.
- You can copy/paste the URL.
- You can use a shortcode.
- To use an iframe embed code, contact us.
![]() For more information on using embedded media and interactive content, see the chapter Display Embedded Media in the Pressbooks User Guide.
For more information on using embedded media and interactive content, see the chapter Display Embedded Media in the Pressbooks User Guide.
Uploading Images or Other Media
In addition to embedding content from the source, you can upload images or other media to be housed in the Pressbook itself. Though there is no limit to the overall capacity of a book, any uploaded media must be under 25 MB. You can upload files from your computer or from a URL, or you can add them first to the the book’s Media Library.
Once you’ve uploaded an image, you can also control the appearance and placement of image by customizing size and alignment. You’ll need to title your image and add alt-tags so that screen readers can display and read all the content properly.
![]() For more information on working with uploaded media, see the chapter Edit Images in the Pressbooks User Guide.
For more information on working with uploaded media, see the chapter Edit Images in the Pressbooks User Guide.
4. Choosing a Theme
The fourth step of the five-step process outlined above is choosing a theme for your book. In this context, the word theme refers to the template that controls the appearance of your book on the web and in export formats such as PDF. You can view and select available theme options by clicking Appearance > Themes in the book dashboard.
![]() For more information on managing the appearance of your book, see the chapter Appearance in the Pressbooks User Guide.
For more information on managing the appearance of your book, see the chapter Appearance in the Pressbooks User Guide.
5. Exporting Your Book
Exporting your book is how you make it available in different formats, so that it can be accessed across different platforms on different types of devices. Besides the default webbook format, Pressbooks supports three different export file formats. Below, see each format and what purpose it serves:
- Print PDF: Export a print PDF file if you plan to publish your book in print format. This file meets the requirements of printers and print-on-demand services.
- Digital PDF: Export and download the digital PDF instead if you do not plan on printing the file. Digital PDFs can be used online and can contain hyperlinks for easier navigation.
- EPUB: Export an EPUB to make the book available in the file format used by nearly all ebook distributors, including Amazon, Apple’s iBooks, Nook, Kobo, Google Play, Smashwords and many more.
![]() For step-by-step instructions on exporting your book, see the chapter Export in the Pressbooks User Guide.
For step-by-step instructions on exporting your book, see the chapter Export in the Pressbooks User Guide.
- This chapter contains material from Using Pressbooks in Getting Started with Open Educational Resources by Mahrya Burnett, Jenay Solomon, and Heather Healy, published under a Creative Commons Attribution 4.0 International License. Information about creating an account with the CUNY Pressbooks Network is original to this chapter, and additional revisions have been made in accord with the style, structure, and audience of this guide. ↵
A tab in the Dashboard menu where a textbook’s publication information can be added. It includes fields such as title, author, editor, book description, license, and copyright information.
A kind of part, placed at the beginning of book content, that contains content like introductions, dedications, prefaces, and acknowledgements.
The default label given to a part found in the central portion of a book. It can be relabeled as needed.
A kind of part that comes at the end of a book after the main content. It can include chapters like a glossary, bibliography, and appendices.
The visual—WYSIWYG—editor view in Pressbooks which allows you to see how content will be formatted in different exported files and the webbook.
The three rows of tools and formatting options available in the Pressbooks Visual Editor. (WYSIWYG is the acronym for “what you see is what you get”.)
The HTML editor view in Pressbooks that allows editing of content as plain text HTML.
A page under the Appearance tab on the Dashboard menu where Administrators can select different appearance and formatting options.
A tab in the Dashboard menu used to export a book into different file formats such as PDF, EPUB, and MOBI.
