2 Shoot your first roll of film
SNAPSHOT
- Understand your camera
- Shoot your first roll of film
GET READY
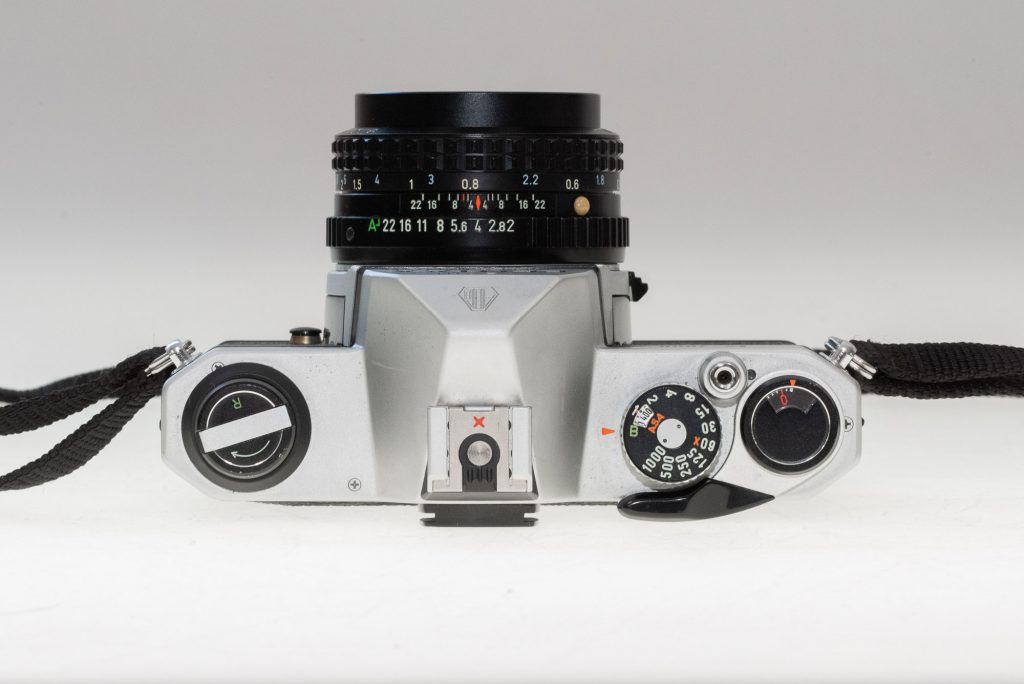
Mechanical cameras have dials and knobs, they use springs and gears to operate.
Electronic cameras have an LED screen and need batteries to operate.
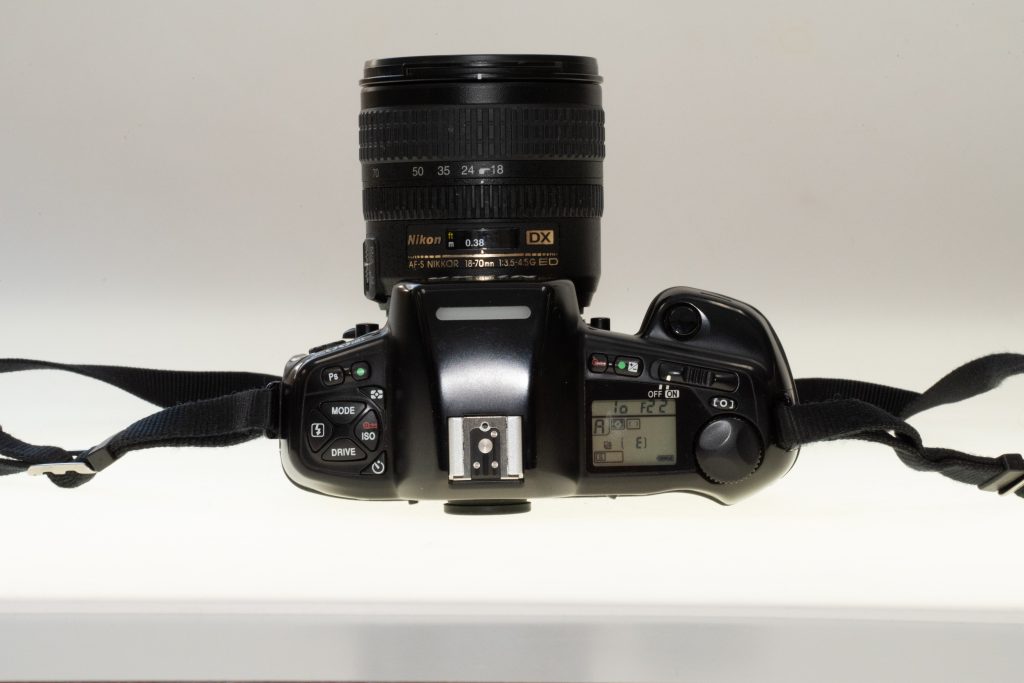
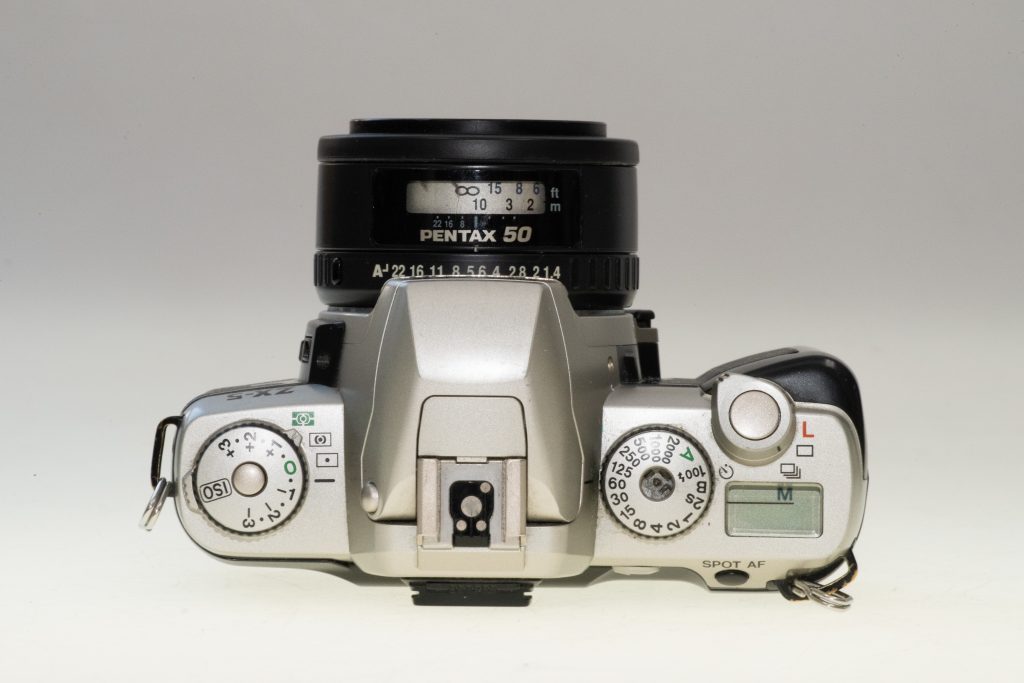
The mechanical and electronic 35mm cameras are both 35mm SLR cameras. SLR stands for Single Lens Reflex.
USE Your camera’s instructional manual
There are many different brands and models of 35mm film cameras. The best way to know your camera is to refer to the instructional manual for the exact make and model. The manual is easy to find even if you have an old camera. Yup, GOOGLE IT.
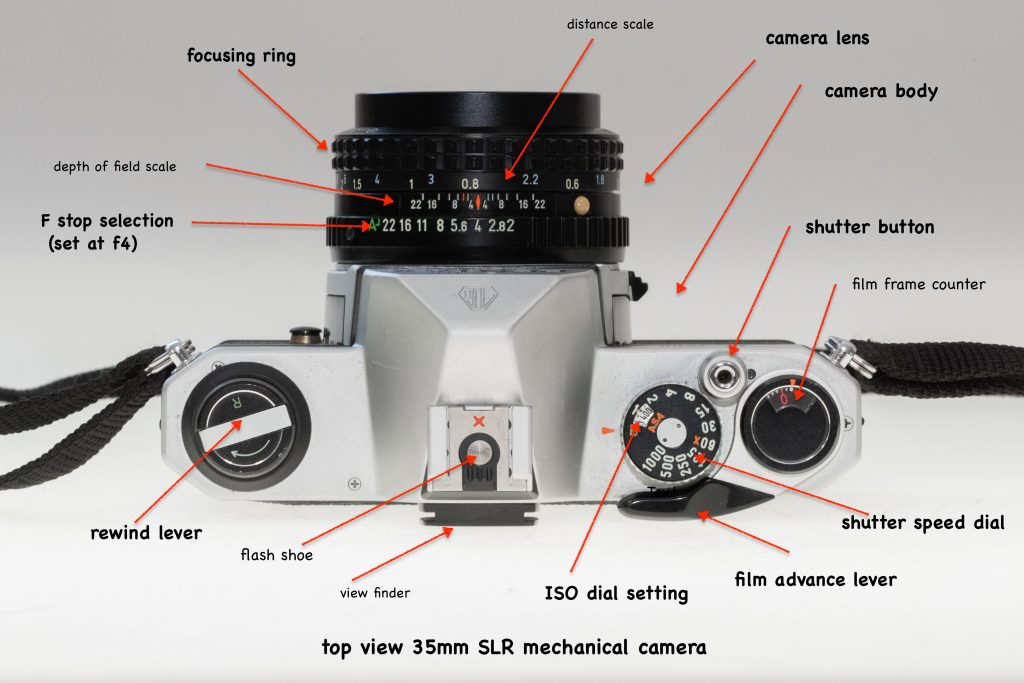
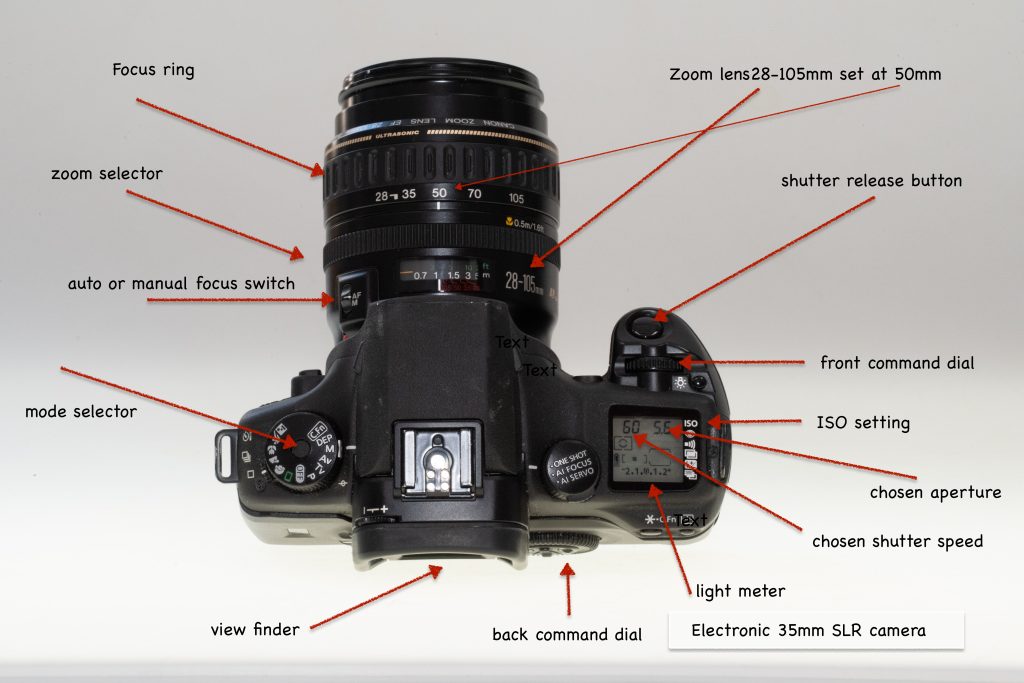
The illustrations below will help you identify all the different parts of your camera, if you can’t find them on your camera….refer to your user manual.
ACTIVITY
- Do you have a mechanical or an electronic camera?
- Identify the parts of your camera using the illustrations above.
- Did you find your camera’s instructional manual?
GET SET
Loading film
This is an important step and easy to mess up, especially if you have a mechanical camera. Pay attention to the video below. The key here is to make sure the rewind knob is turning clockwise every time you advance the film. There are Youtube videos for almost every SLR camera out there showing how to load film. Go ahead and google the type you have.
Below are videos we made for you to guide you on how to load and unload film for both mechanical and electronic cameras.
Loading a mechanical 35mm SLR camera
Unloading a mechanical 35mm SLR camera
Loading an electronic 35mm SLR camera
Unloading an electronic 35mm SLR camera
GO
Follow these steps to start taking pictures today!!
Use the following settings outdoors in sunlight, keeping the sun on your back.
Quick Start for mechanical cameras
- Insert a roll of B&W film ISO 400 into the camera (double check that it is loaded correctly).
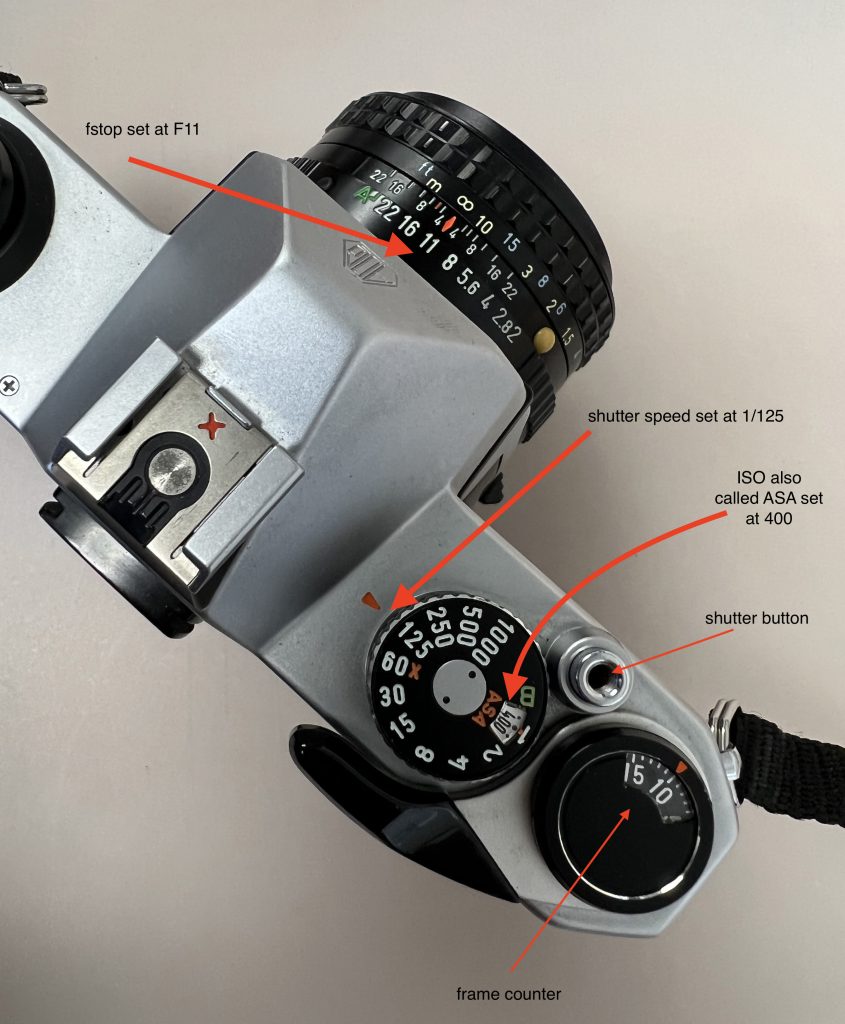
- Set your camera ISO to 400.
- Set your shutter speed to 125.
- Set your aperture to F11.
- Point your camera at your subject, with the sun behind you.
- Focus on the main subject and shoot.
- Continue taking pictures until you come to the end of the roll.
- You are at the end of the roll when you can’t advance the film anymore.
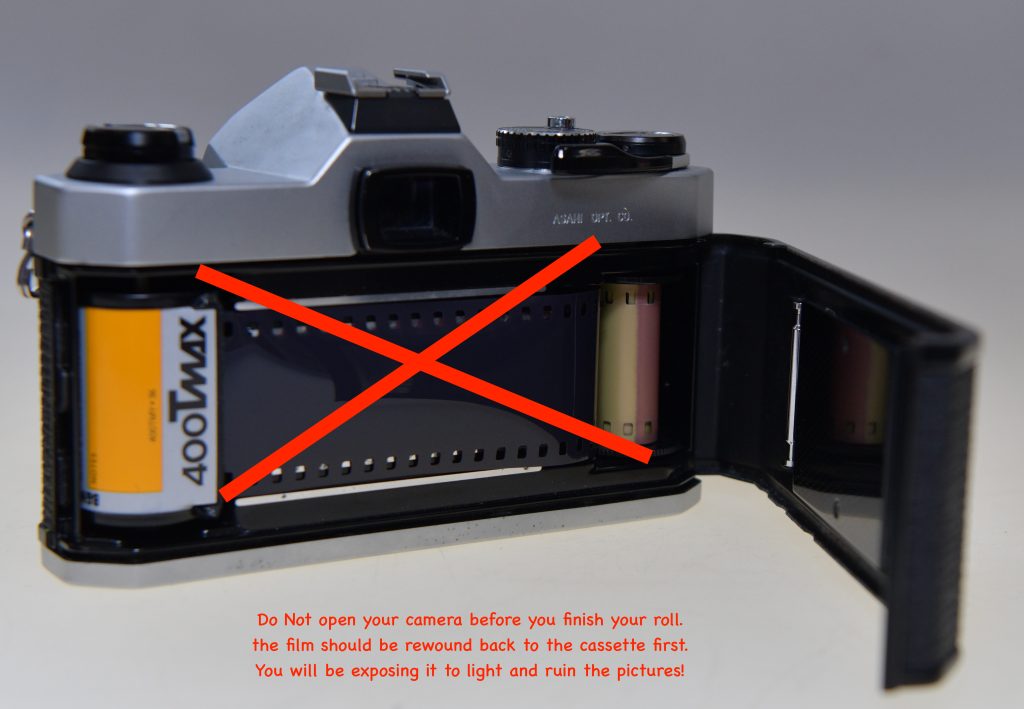
- Do not open your camera yet.
- Rewind the film back into the light-safe film cassette before opening the back of your camera by pushing the rewinding button, a small button at the bottom of the camera, and then turning the rewind knob clockwise until you feel the film released.
- Open the camera and take the film out by gently pulling up on the rewind knob.
If you open the back of the camera at any point before you come to the end of the roll or before rewinding you will expose the film to light and ruin it. This is the second most frequently made mistake when you start using a film camera. Please …. don’t let this be you.
Quick start for electronic cameras:
- Insert a roll of B&W ISO 400 speed film in your camera.
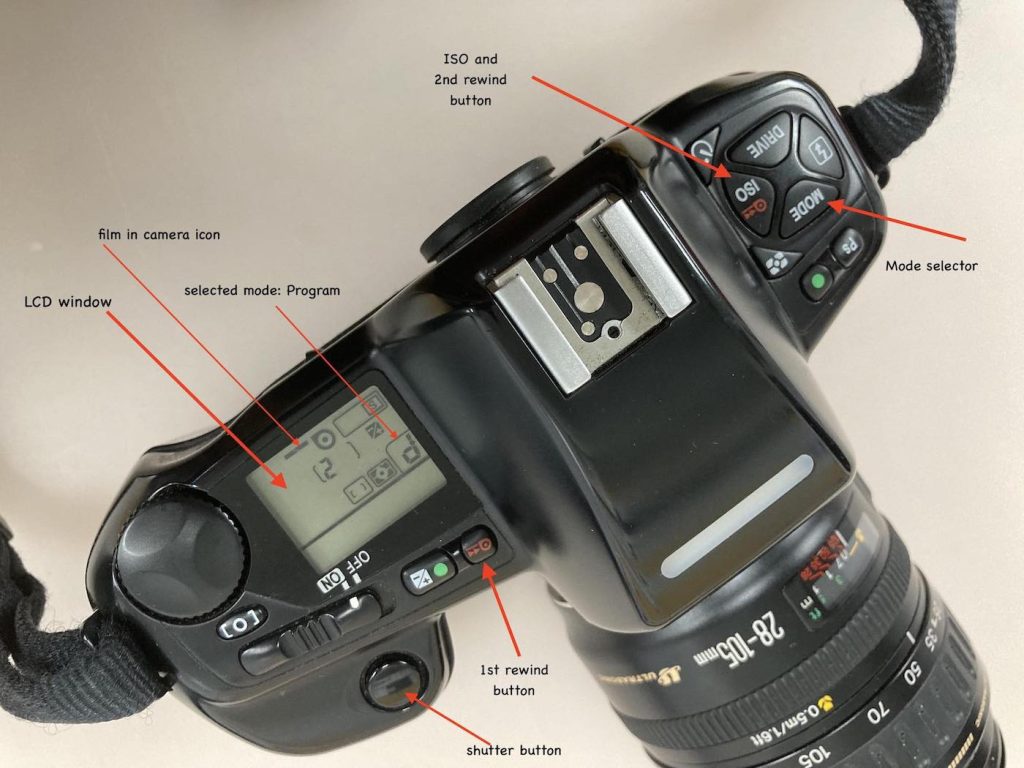
- Use the A (Auto) or P (program) mode and start taking pictures!
- Focus on your subject using autofocus.
- Continue taking pictures, until you finish the roll.
- Do not open the camera at any point while shooting.
- Rewind the film back into the light-safe film cassette before opening the back of your camera. Many electronic cameras will automatically rewind at the end of the roll. (if your camera does this you will hear a whirring noise) while some electronic cameras require you to push two buttons at the same time to begin the automatic rewinding.
- Check your instructional manual if you are not sure how to rewind the film back into the light-safe film cassette before opening the back of your camera!
ACTIVITY
- Load your camera with B&W ISO 400 speed film.
- Go outside and start photographing what you see. Pay attention to the direction of the light. Does the light illuminate your subject? How does it shape what you are looking at?
What to take pictures of
- LIGHT! Light is key to all photography. Pay attention to where the light is coming from, and how it shapes what you are looking at.
- ANGLES! Everything looks different from different angles, look up, look down, and walk around your subject. Hey, think about this: tall people see the world differently than short people, try being tall if you’re short, or short if you’re tall. Stand on chairs, lie on the ground, crawl….be creative! This is the fun part.
- ACTION! put yourself in the middle of the action, don’t be shy, your camera will protect you 🙂
- Still not sure what to take pictures of?
- Try this prompt: imagine you are 3 years old, you think you are lost (of course your parents are close by) but because you are small you don’t immediately see them. You are easily distracted by all the new things around you. Photograph what catches your eye, keep in mind you’re probably 2 ½ ft tall and the world is new and amazing.
- TAKE BAD PICTURES! I’m not kidding, don’t be afraid to take chances, there are no bad pictures, but there are missed opportunities for great pictures because you were afraid to be different.
Check out the chapter on Fun Photo Assignments for more ideas.
DID YOU KNOW
Some of the most popular subjects of photography in the 1800s were corpses.
KEY TAKEAWAYS
- Load your camera with film correctly
- Take pictures
- When you come to the end of the roll rewind the film before opening the camera
If this whets your appetite…..READ ON
A mechanical SLR camera works with springs and gears
An electronic SLR camera requires batteries and a computer chip to operate and it has an LED screen.
SLR stands for Single Lens Reflex. The camera has only one lens (single) which forms the image to be recorded on the film and is shown through the view finder.
Mechanism used to rewind the film back into the canister.
ISO International Standardization Organization is a rating system for film speed or the film’s sensitivity to light. ISO has replaced the term ASA
The length of time the shutter(curtain) stays open during exposure. The photographer sets the desired time using the shutter speed dial
Aperture is the adjustable lens opening that controls the amount of light allowed into the camera.
Focus is the process of making the image appear sharp at a certain distance from the camera. You focus by turning the focusing ring on your camera while looking through the viewfinder This can be achieved by either using manual focus or the autofocus system your camera provides.
A small button usually at the bottom of the camera. When pressed it releases the film from the take-up spool and allows for rewinding the film back to the canister
