12 HOW to use a light meter
SNAPSHOT
Light meters
- TTL Light meter in your camera
- Hand Held Light meters
- Working without a light meter
WHAT is a light meter?
A light meter is a device that measures the amount of available light entering the camera and converts it into a reading informing you what aperture and shutter speed settings to use to obtain a correct exposure.
Light comes from artificial sources, such as light bulbs, candles, or even the glow of a computer screen. It also comes from one natural source, the sun. If you can see it, You can photograph it! The light meter will tell you how.
Now that you understand how the three variables (Aperture, Shutter speed, and ISO) work together it’s time to learn how to properly use your light meter.
Most cameras today have a light meter built into them, this makes it convenient for the photographer but not essential. Without a working built-in light meter, you can use a handheld light meter to accurately measure light.
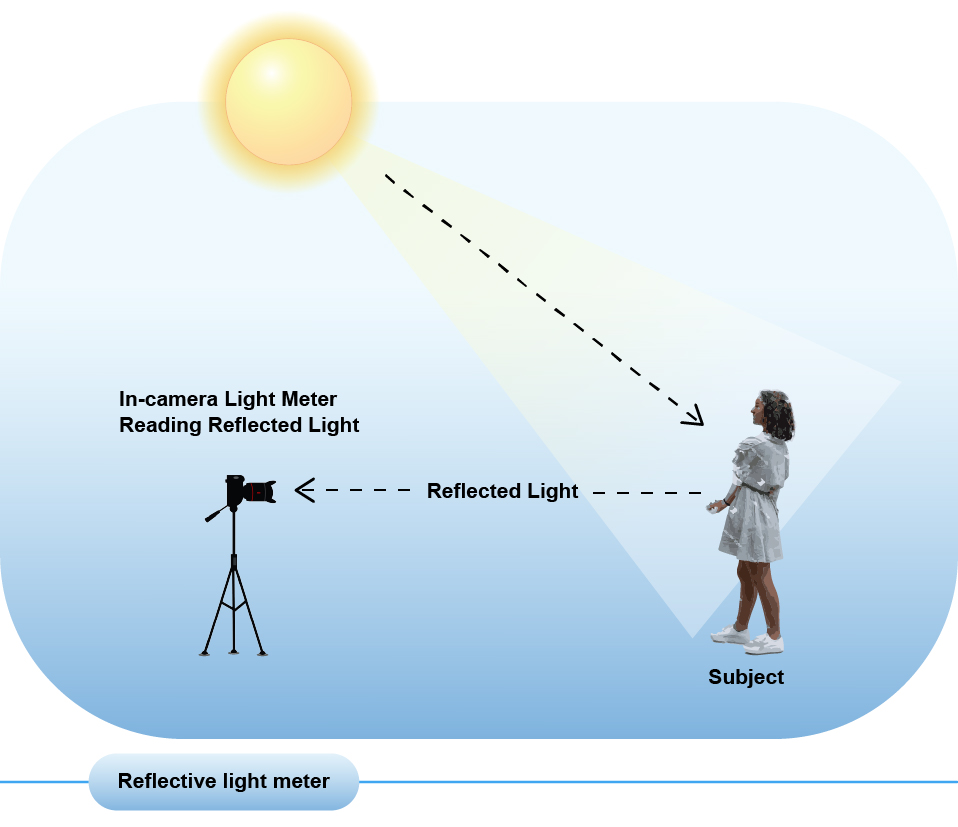
There are several different ways of measuring light, first, we will focus on using the light meter in your camera. This metering system is called a reflective reading for a very simple reason, the light meter reads the amount of light bouncing or reflecting off your subject. It also uses a system called through the lens metering or TTL.
HOW to use the light meter inside your camera
For Through The Lens (TTL) metering follow the steps below:
- Set the camera ISO to match the ISO of your film
- Aim your camera at your subject
- Activate the light meter
Typically you have to press the shutter release button down ½ way to activate the light meter. The meter will stay on for a few seconds while you view the meter reading. If it turns off before you are finished, just push it ½ way down again.
In the beginning, you may accidentally push the shutter release button down all the way, and take a photo, no worries this happens a lot until you get used to the feeling of ½ way.
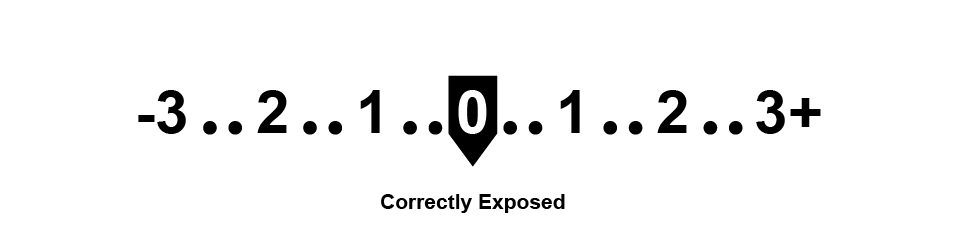
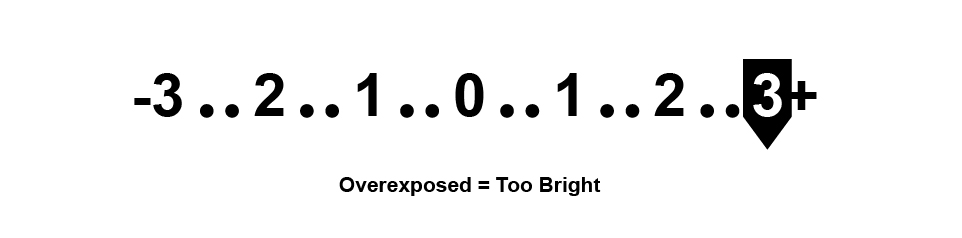
- Cameras will have different ways of indicating if camera settings are [over +] [under – ] or correct.
 |
 |
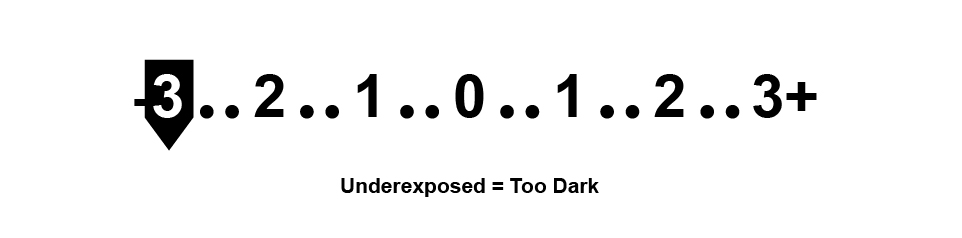 |
- Review your camera manual to understand your light meter displays.
- Your goal is to get the correct exposure by adjusting the aperture and the shutter until the light meter indicates you have achieved the correct exposure.


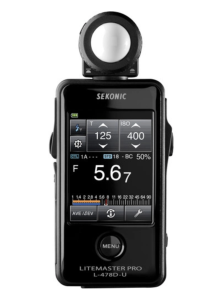
What are Handheld light meters
There are two different ways of measuring continuous light using a light meter:
- Reflective light
- Incident light
Today it is common to have a light meter built into the camera, however, many professional photographers prefer a handheld light meter. Handheld light meters read both incident and reflective light, while in camera light meters only read reflective light.
A reflective light meter reads light that bounces off the subject. When you point the light meter at your subject, it is reading the light being reflected off your subject and back to the camera. The light meter in your camera is reflective. This type of metering is convenient, all you do is point the camera or light meter at your subject to get a light reading. The problem with this reading is there are other light sources reflected back to the camera that may confuse the meter. The reflective light meter doesn’t know what your subject is, and will take in all the light from the scene. This makes this reading particularly helpful for landscape photography and general scenes.
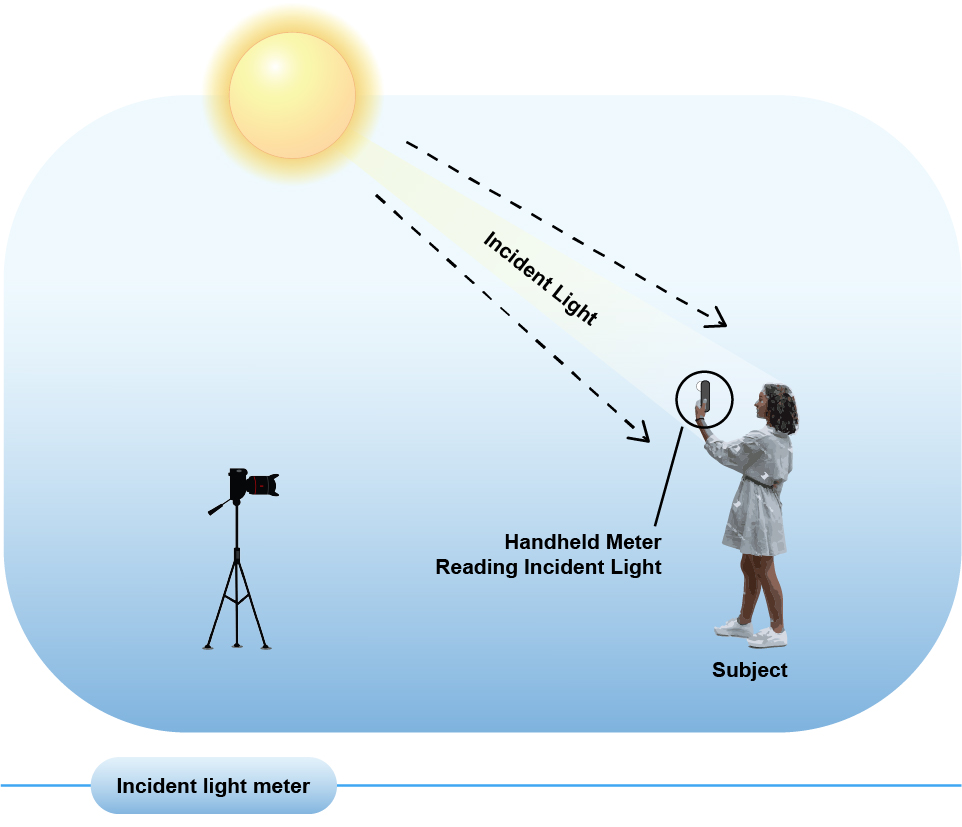
An incident light meter reads the light landing on the subject. This can be inconvenient because you have to hold the light meter up to your subject, which is not always possible, however, it is the most accurate way to read light.
The lumisphere (white bulb on the light meter) is the incident reader. The photographer holds the meter in front of the subject with the bulb facing the camera. This reads the amount of light falling on the subject. An incident light meter is most useful for portraiture and close-ups.
Flash meters measure the light from a flash or strobe. Since this kind of light is not constant, it requires a special hand-held light meter that can measure the light being emitted in a fraction of a second. They can read both reflective or incident light.
As mentioned before the 35mm film cameras you have are secondhand. Some are in very good condition and others probably need a tune-up. This means there is a good possibility that your in-camera light meter is not working properly. There are some easy solutions for the problem that do not include buying a handheld light meter.
Learn how to use the f 16 rule and/or download a light meter application on your phone – see chapter Light meters doesn’t work Now What ?
Why light meters love middle gray
The human eye sees a huge tonal range from super bright light to dark shadows and many, many subtle tones in between. A camera, whether digital or film, can’t capture the whole range of tones that the human eye can see. A light meter takes that wide range of tones (from light to dark), and translates it into the limited tonal range of a photograph. A light meter can’t tell if the light source is the sun, a light bulb, a flashlight, or moonlight, it is also color blind, and can’t tell if something is rosy red, apple green, or sky blue. What it can tell is the intensity of light reflecting off the objects it is pointed at. It averages all the light in the frame and suggests a combination of aperture and shutter speed to give you a correct exposure. This is where middle gray comes in. Imagine if different light intensities were translated into numbers from 1 to 10. 10 being the brightest and one being the darkest, that would make five middle grey. The light meter measures all the light in a scene, and averages it out to give you an exposure setting that results in a 5 (middle gray). If you expose your picture for this setting, the areas that had a light intensity of 10 will be white because they are brighter than 5, and the areas that had a 2 intensity will be dark because they are darker than 5. Whatever you point your meter at, it will find middle gray. This works well when you have an average lighting situation.
Your reflected light meter is in love with middle gray. It does its best to turn anything you meter into a middle gray tone.
Activity: Testing for Middle Gray
- Tape a large piece of black paper to the wall
- Tape a white sheet of paper (same size as the black sheet) right next to it
- Look through your viewfinder so that all you can see is the black paper (it doesn’t have to be in focus)
- Take a light meter reading and expose the film exactly as the light meter suggest
- Do the same with the white sheet of paper, be sure to read your light meter and expose it correctly
- Now step back and get both the black and white paper in your viewfinder, read your light meter and expose it correctly
- You will find that both the white and black sheets of paper print gray, not black or white, that’s because the light meter, meters for middle gray, so even though the paper is black the meter loves gray
- When you put the 2 sheets of paper together, and meter the black will come out black and the white will be white because the meter exposed for the middle makes the darker paper black and the lighter paperwhite
Through The Lens metering/ TTL. When you focus your camera with that half push of the shutter, your camera is not only focusing, but it's taking a reading (metering) of the scene. That measurement tells you how much ambient light is reaching through the lens the film
Continuous light is studio lighting that stays on all the time (as opposed to flash or strobes that emit a bright burst of light when triggered
