9 Using your SLR camera
SNAPSHOT
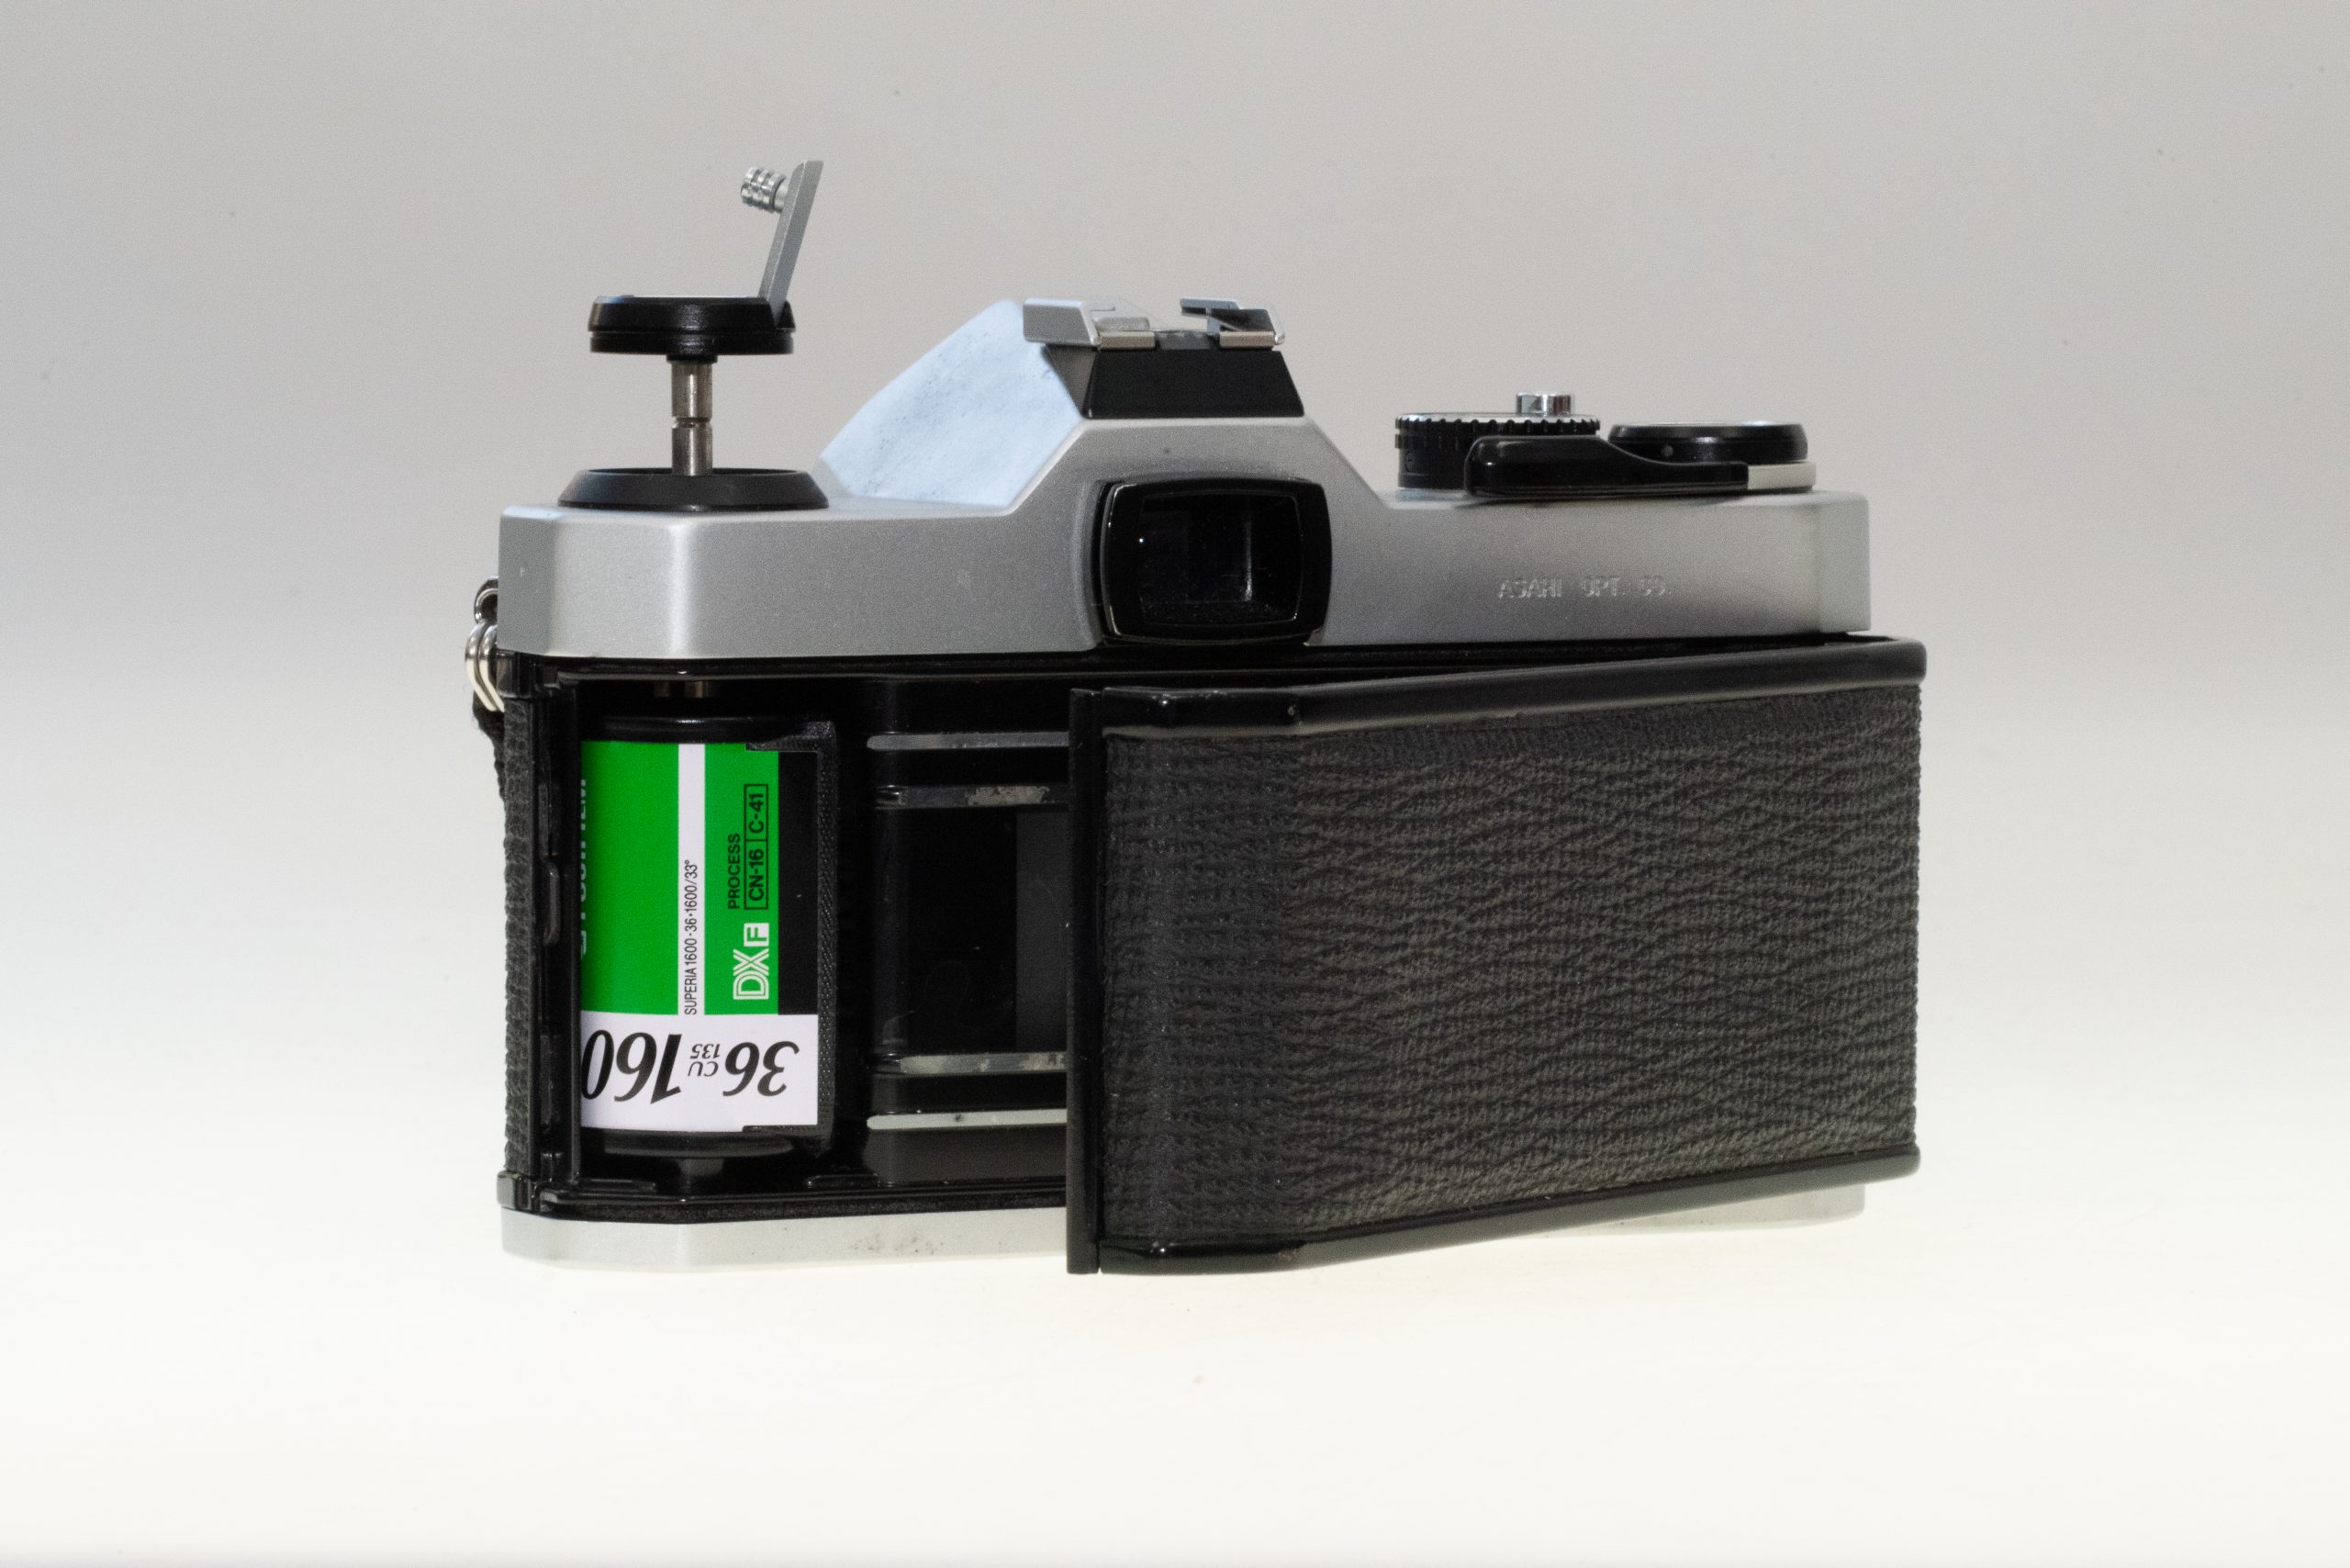
- How to load film into your camera correctly
- How to rewind the film at the end of the roll
- How to focus your image
- Holding the camera correctly
Loading & rewinding film
Loading film in a Mechanical camera
Follow these steps and watch the video….the only way to be sure the film is properly loaded is to be sure that the rewind knob turns when you advance the film.
- With the rewind knob pulled up, press the film into the left side of the camera. Now push the rewind knob down to secure a tight fit.
- Pull the leader of the film over to the take-up spool. Insert the narrow end of the film leader into the slot. Hold the spool steady with one hand and push the film into any slot on the take-up spool.
- Make sure the teeth are properly placed on both sides of the film. Carefully turn the rewind knob to take in any slack in the film.
- With the back open, press the shutter release button, as if you are taking a picture, then advance the film. The film will start wrapping around the take-up spool.
- Close the back of the camera. Click (press the shutter button) and advance the film two more times with the back closed. Watch the rewind knob when you do this, if it is moving, you have correctly loaded the film in your camera. If it does not move, gently turn the rewind knob clockwise until you feel a very slight resistance.
- Now press the shutter release button again and watch the rewind knob. If it moves, you are ready to take pictures!
- If it did not move you must open the back of the camera and try to load the film again.
DID YOU KNOW
Whoever said there is no crying in photography must have been a digital photographer.
Film photography is not for wussies!
Rewinding film in a Mechanical camera
To rewind the film look for the rewind button and the rewind knob. On most mechanical cameras the rewind button is on the bottom of the camera. It is a very small button (see the diagram in Chapter 1) the rewind knob is usually on the top of the camera on the left side, and it has a handle that can be pulled up to make rewinding easier.
Now that you’ve located these mechanisms, here’s what you do. Push the film rewind button and start rewinding the film using the rewind knob. Turn the knob clockwise. You will feel some resistance, but you should not have to force it. You will feel the resistance let up when all the film is back in the film canister and it is safe to open the camera and take the film canister out. Just to be sure it has rewound all the way, I like to turn it a few seconds after it feels like it’s released.
Loading Film in an Electronic camera
Open the camera and place the film cassette on the left side of the camera. Pull the leader of the film across the back of the camera and let the leader gently curl itself around the take-up spool on the right side of the camera. Close the back of the camera and you will hear a motor or whirring sound, indicating your film is being advanced to the first frame. If the number 1 or 36 appears in the film counter window, then you are ready to start taking pictures. If you get flashing dotted lines or ERR or some message other than 1 or 36 then you made a mistake and need to open the camera and reload the film. Your camera manual will give you specific instructions for your make and model camera.
Rewind film in an Electronic camera
Admittedly, you have it easy on this one. Most cameras will automatically rewind your film when it gets to the end of the roll. Some cameras require you to push two buttons at the same time to start the motorized rewind. Check your manual if you’re not sure. There is one thing that can go wrong, and that is a weak battery. Electronic cameras rely on battery power, and rewinding film takes the most amount of juice from the batteries. So if the batteries are running low, your camera won’t be able to rewind the film. Don’t panic, just replace the batteries.
Always have spare batteries in your camera bag, especially if you have an electronic camera.
How to hold your camera

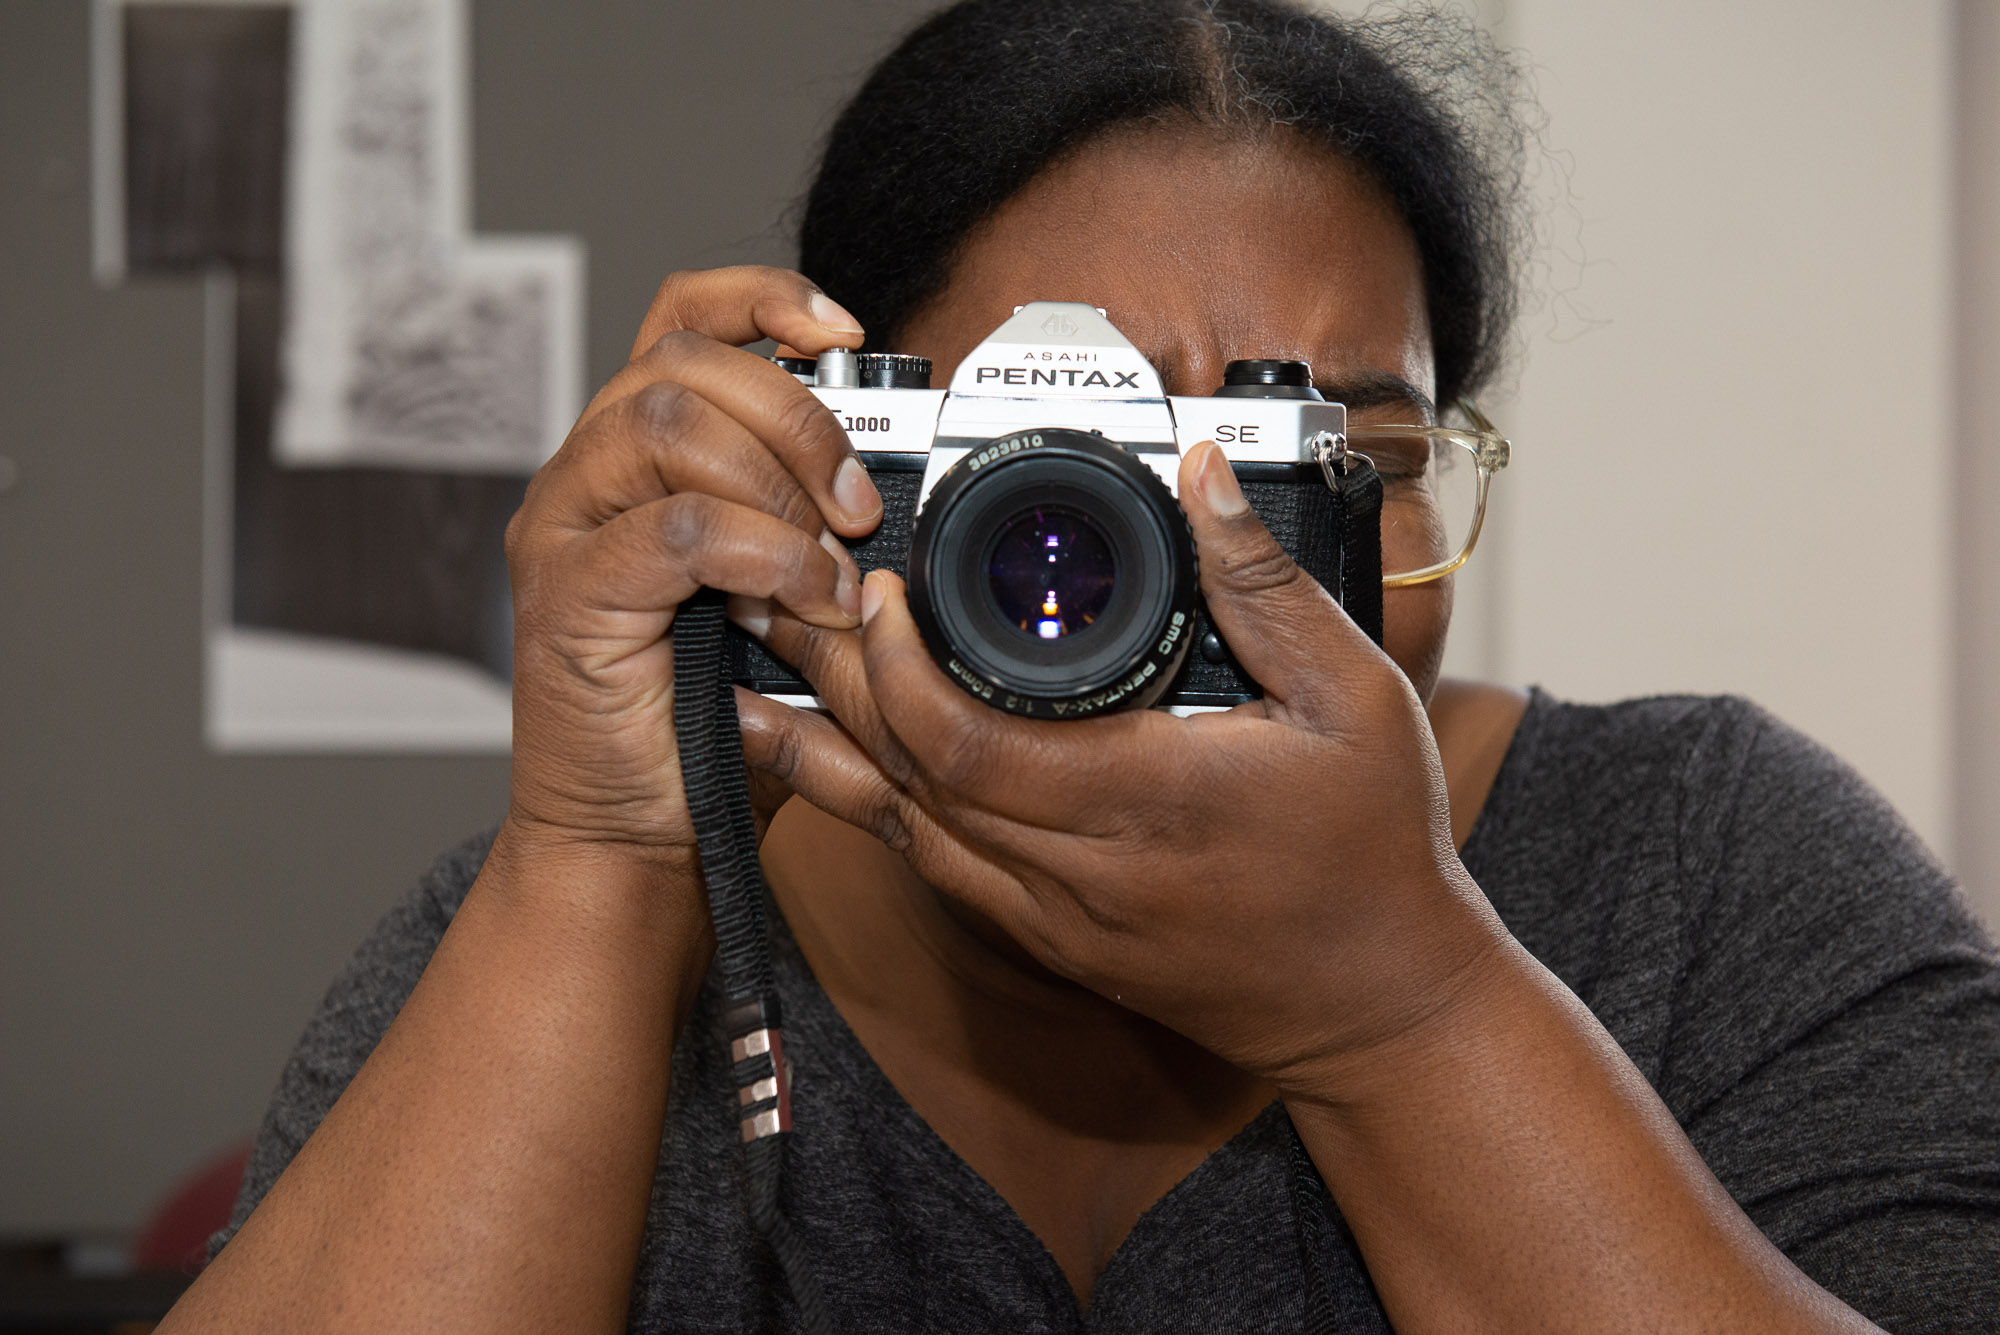
You want to hold the camera as steady as possible, use both hands, one to stabilize the body of the camera, as well as to have easy access to the focusing ring. Your other hand should have your finger on the shutter release button at all times, ready to press it the moment you are inspired.
Focus
Not all cameras have an autofocus function. This means you will need to manually focus the camera by turning the ring on the front of the lens barrel while you check for sharpness by looking through the viewfinder. Check your camera manual and find out the focusing system used.
I tend to think of the act of photographing, generally speaking, as an adventure. My favorite thing is to go where I’ve never been.
-Diane Arbus
What to take pictures of
LIGHT! yes light is key to all photography. Pay attention to where the light is coming from, and how it shapes what you are looking at.
ANGLES! yes, things look different from different angles, look up, look down, and walk around your subject. Hey think about this, tall people see the world differently than short people, try being tall if you’re short, or short if you’re tall. Stand on chairs, lie on the ground, crawl….be creative! This is the fun part.
ACTION! put yourself in the middle of the action, don’t be shy, your camera will protect you 🙂
ILLUSIONS! make the viewer look harder.
HUMOR! make your viewer crack a smile or laugh out loud!
TEXTURES! let the viewer ‘feel’ and ‘smell” your photos!
TAKE BAD PICTURES! I’m not kidding, don’t be afraid to take chances, there are no bad pictures, but there are missed opportunities for great pictures because you were afraid to be different.
B&W photographs by Roberta Dorsett
B&W photographs by Tomoko Daido
DID YOU KNOW
The camera only has one eye. Are you left-eyed or right-eyed? Check out which is your dominant eye. Use that eye to look through the viewfinder.
Check out the chapter on Fun Photo Assignments for more ideas.
ACTIVITY
- Use an outdated roll of film to practice loading your camera. This may sound unnecessary but we promise you it is important and will save you time and money going forward
- When ready and confident load a fresh roll of film into your camera go out and take pictures! Take a look at the quick start section of this book
KEY TAKEAWAYS
- Load film correctly
- Take pictures outside
- Check and double-check that the rewind knob is turning every time you take a photo
- REWIND YOUR FILM BEFORE OPENING THE CAMERA
Mechanism used to rewind the film back into the canister.
The curved part of the film at the beginning of a 35mm roll of film
The button you press to take a picture. When you press it the shutter stays open for the time the shutter speed is set.
The button you press to release the film from the take-up spool and rewind it back to the canister
the ring on the front of the lens barrel
Focus is the process of making the image appear sharp at a certain distance from the camera. You focus by turning the focusing ring on your camera while looking through the viewfinder This can be achieved by either using manual focus or the autofocus system your camera provides.
